Ever wondered how to turn simple IKEA pieces into stunning, personalized furniture that truly reflects your style? Smastad IKEA hacks have taken the DIY world by storm, thanks to their versatility, affordability, and the endless possibilities for customization. These hacks allow you to transform basic cabinets and shelving into eye-catching, functional pieces that elevate your home decor without breaking the bank.
Their popularity lies in their adaptability—whether you want a sleek bathroom vanity, a rustic kitchen island, or a chic media console, Smastad hacks can be tailored to fit any space and aesthetic. In this article, you’ll discover a treasure trove of creative inspiration and practical ideas to elevate your home using Smastad IKEA hacks.
From transforming cabinets into statement furniture to repurposing units for outdoor use, each idea is designed to spark your imagination and help you craft unique, stylish pieces. Whether you’re a seasoned DIY enthusiast or just starting out, you’ll find plenty of clever tips and trendy ideas to inspire your next home makeover.
1. Transforming Smastad Cabinets into Chic Bathroom Vanity Units
Are you tired of the generic look of traditional bathroom vanities? Turning your Smastad cabinets into a stylish, personalized vanity offers a perfect blend of function and fashion that elevates your entire space. This hack not only saves money but also creates a unique focal point that reflects your style.
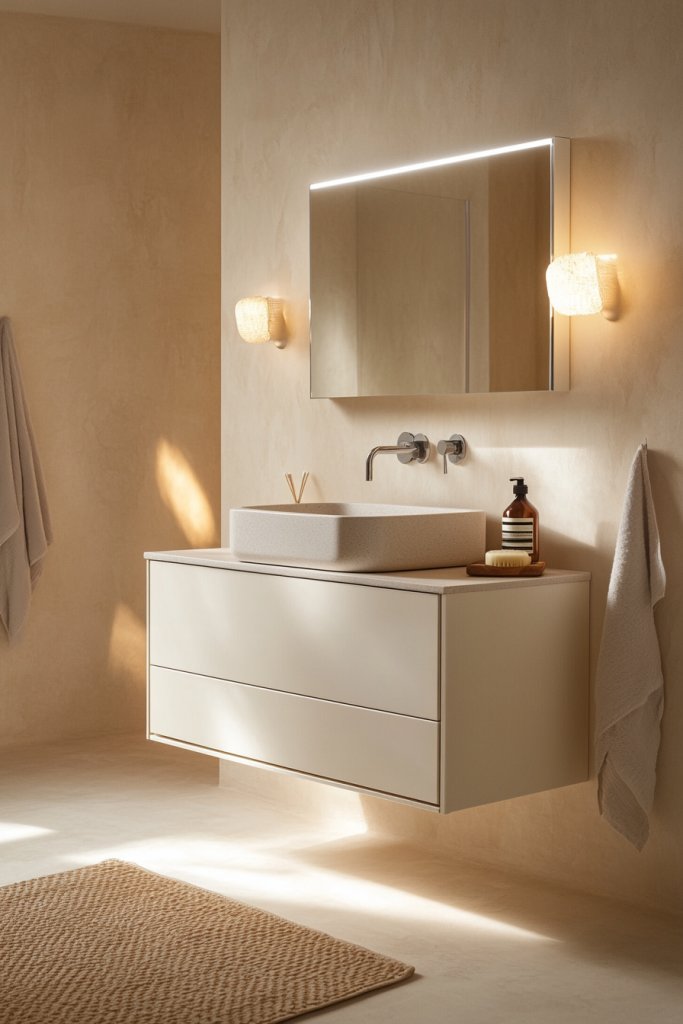
Imagine a sleek, matte black Smastad cabinet fitted with a crisp white ceramic basin resting atop it, with a warm oak countertop for contrast. The cabinet doors are subtly recessed, hiding everyday essentials behind minimalist handles, while open shelving underneath displays plush towels and decorative jars in soft pastel hues.
The space feels fresh and inviting, with a hint of industrial charm from the metal hardware, complemented by the smell of fresh linen and clean citrus from nearby toiletries. The overall look is modern yet cozy, perfect for a spa-like retreat in your home.
To achieve this look, start by selecting a sturdy Smastad cabinet and a compatible basin, such as a ceramic or stone vessel. Remove or modify the cabinet doors if desired for a more open aesthetic.
Attach a wooden or stone countertop, securing it firmly to the top. Replace the hardware with matte black or brushed nickel handles for a sophisticated finish.
Finish by adding a wall-mounted mirror and lighting fixture for extra glam. For budget-friendly options, consider spray-painting the hardware or using peel-and-stick wallpaper behind the vanity for an added decorative touch.
2. Customizing Smastad Shelving for a Modern Living Room Display
A well-organized living room deserves eye-catching shelving that balances practicality with style. Customizing Smastad shelving allows you to craft a tailored display unit that showcases your favorite decor, books, and accessories in a sleek, contemporary way.
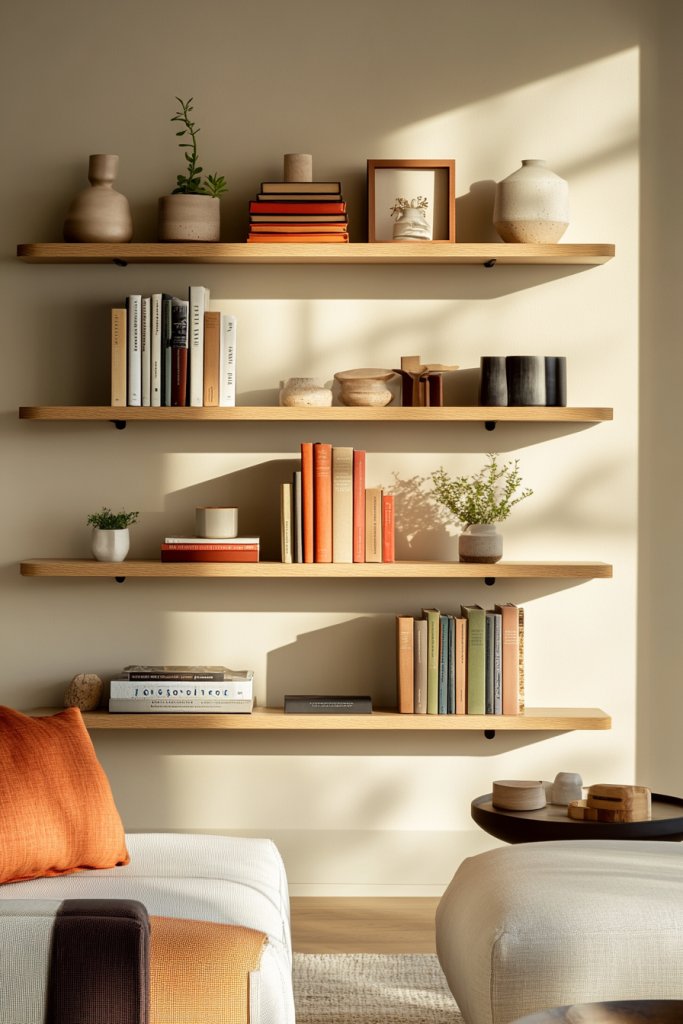
Visualize a minimalist setup with a series of interconnected Smastad shelves painted in a soft matte gray, arranged asymmetrically on a clean white wall. The open shelves are filled with a mix of textured ceramics, a few framed photographs, and cozy throws draped casually over the edges.
The combination of warm wood tones and cool neutrals creates a calming atmosphere, while the layered arrangement adds depth and visual interest. Soft ambient lighting highlights the textured surfaces and makes the entire display inviting and sophisticated, perfect for a modern aesthetic.
To customize your own, start by measuring your wall space and selecting appropriate Smastad units in sizes and configurations that suit your needs. Sand and paint the units in your preferred color—popular choices are muted pastels or deep charcoal.
Secure the units to the wall with appropriate anchors, ensuring they are level. Decorate with a mix of decorative objects like woven baskets, small sculptures, and colorful books, arranging them thoughtfully to avoid clutter. Finish with warm LED strip lighting underneath or behind the shelves to create a subtle glow that enhances the visual appeal.
3. Creating a Rustic Kitchen Island with Smastad Components
Transforming Smastad furniture into a rustic kitchen island is a clever way to add charm and extra functionality to your cooking space. This DIY project brings a warm, inviting vibe that combines practicality with a handcrafted look.
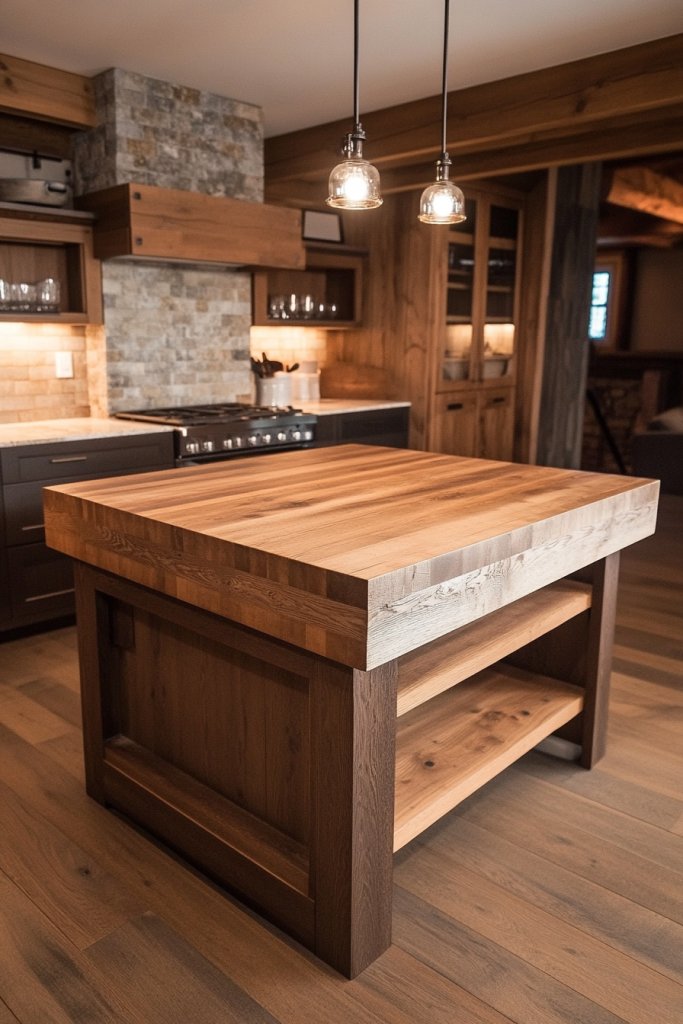
Picture a sturdy wooden top made from reclaimed wood, resting on a base fashioned from Smastad cabinets painted in a distressed white or earthy tone. The open shelving underneath is perfect for storing pots, pans, and kitchen essentials, while the spacious surface invites meal prep or casual dining.
The textured wood contrast with the sleek, painted cabinetry creates a cozy, farmhouse-inspired aesthetic. The scent of fresh herbs and baked bread fills the air, making the kitchen feel alive and welcoming.
This island becomes a focal point where rustic charm meets everyday utility. To build this, start by choosing a solid wooden slab or reclaimed wood for the top, securing it to the Smastad base with strong brackets or L-brackets.
Paint or distress the cabinets for a weathered look if desired. Add casters to the base for mobility or leave it stationary for permanence.
Incorporate open shelves or hooks for hanging utensils, and consider adding a backsplash of patterned tiles or beadboard for extra rustic detail. Finish by accessorizing with vintage-inspired hardware, a woven basket for produce, and a few potted herbs to complete the cozy, functional centerpiece.
4. Upgrading Smastad Dressers with Bold Paint and Unique Hardware
A simple Smastad dresser can be transformed into a bold statement piece with a fresh coat of paint and eye-catching hardware. This hack breathes new life into basic furniture, injecting personality and color into your space.
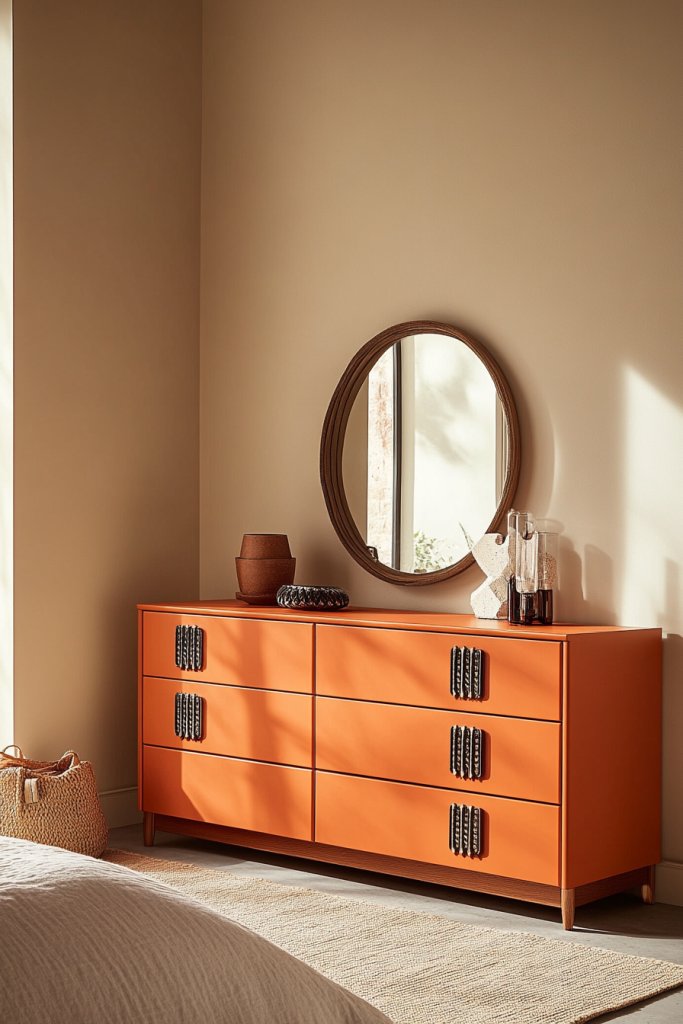
Envision a sleek dresser painted in a vivid emerald green or deep navy, with contrasting gold or matte black hardware that adds a touch of sophistication. The smooth surface and clean lines of the Smastad piece create a modern canvas, while the bold color and metallic accents turn it into a focal point.
Soft textiles like a plush throw blanket or decorative pillows placed on top add warmth, and the texture of the hardware provides a tactile surprise. The result is a lively, contemporary look that can brighten a bedroom, hallway, or living room instantly.
To achieve this transformation, start by removing existing hardware and sanding the surface lightly for better paint adhesion. Choose a high-quality, matte or semi-gloss paint suitable for furniture—alternatives include chalk paint for an ultra-matte finish.
Once dry, attach your chosen hardware—think vintage pulls, geometric knobs, or sleek bar handles—using a drill and screwdriver. For added flair, consider stenciling or taping geometric patterns with painter’s tape before painting for a more graphic look. Seal the paint with a clear topcoat to protect your work, and then style with decorative accessories to finish your upgraded piece.
5. Turning Smastad Table Frames into Stylish Entryway Consoles
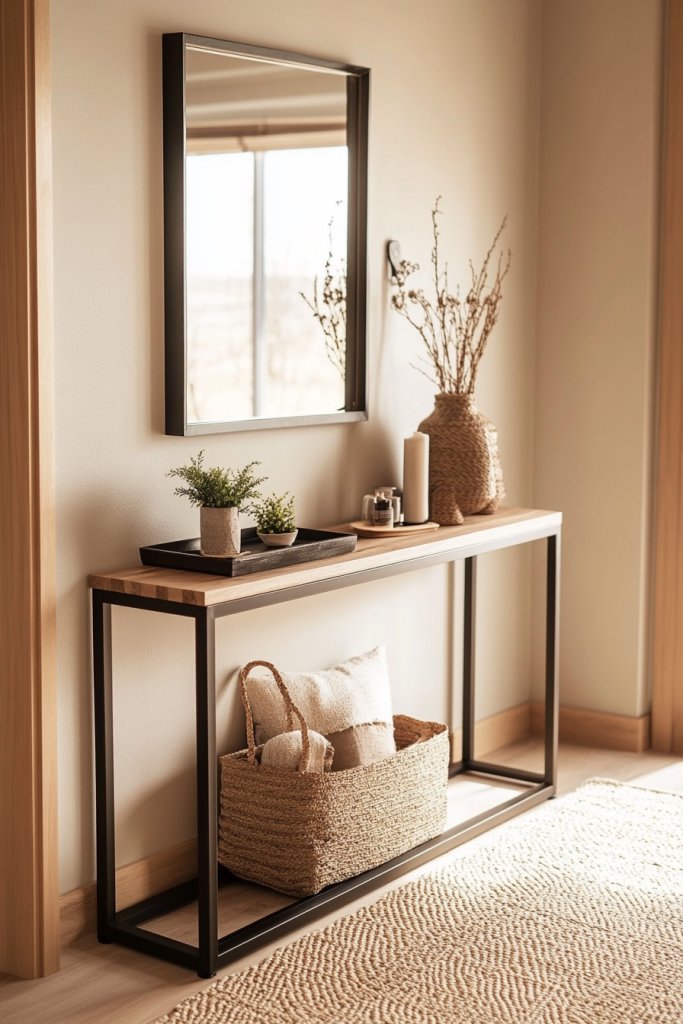
An entryway console makes your home feel welcoming and organized, and repurposing a Smastad table frame offers a stylish, budget-friendly approach. This hack transforms a basic frame into a functional and chic piece that sets the tone as soon as you walk in.
Picture a slim, elongated table with a smooth wooden surface, painted in a soft pastel hue like blush pink or muted sage. The open frame underneath provides space for baskets or shoe storage, while the top surface is decorated with a ceramic tray for keys, a small potted plant, and a cozy candle.
The clean lines and airy feel of the piece make the space look uncluttered and inviting, with a touch of personal charm. The textured surface of the wood paired with the painted finish creates a balanced, contemporary look that’s perfect for modern homes.
To create this, start by selecting a Smastad table frame and prepping it with light sanding. Paint the frame in your preferred color, using a durable furniture paint—alternatives include spray paint or chalk paint for easier application.
Add a sturdy wooden or laminate top, secured with screws or brackets. Decorate with functional accessories like a wire basket for mail, a small mirror above, and a few decorative objects such as a woven basket for shoes or a cozy throw draped over the side. Finish by sealing with a clear lacquer for durability, and enjoy your custom entryway piece that combines style with practicality.
6. Building Multi-Tiered Storage Solutions for Small Spaces
Maximizing storage in small spaces can be a game-changer for creating a clutter-free, functional home. Using Smastad units to build multi-tiered storage offers a stylish and practical way to keep your essentials organized without sacrificing aesthetic appeal.
Imagine a compact setup with several Smastad shelves stacked vertically, forming a layered storage system. Each tier can feature open spaces for decorative baskets or boxes, in soft neutrals like beige or cool gray.
The texture of the metal shelves contrasts beautifully with woven baskets or fabric-lined compartments, adding warmth and visual interest. Small decorative objects, like ceramic vases or textured candles, can sit atop, creating a cozy yet organized vibe.
The overall look is sleek, modern, and tailored to small nooks or corners, making your space feel larger and more intentional. To create this multi-tiered solution, start by measuring your available wall space and selecting several Smastad units that fit comfortably.
Secure the units to each other and mount them to the wall using appropriate hardware, ensuring safety and stability. You can leave some shelves open for easy access or add doors or drawers for concealed storage.
Incorporate baskets made from natural fibers or colorful fabric to customize the look and add versatility. This DIY project is perfect for beginners and can be completed in a few hours with basic tools, turning a simple idea into a stylish, space-saving marvel.
7. Designing a Minimalist Home Office Desk Using Smastad Elements
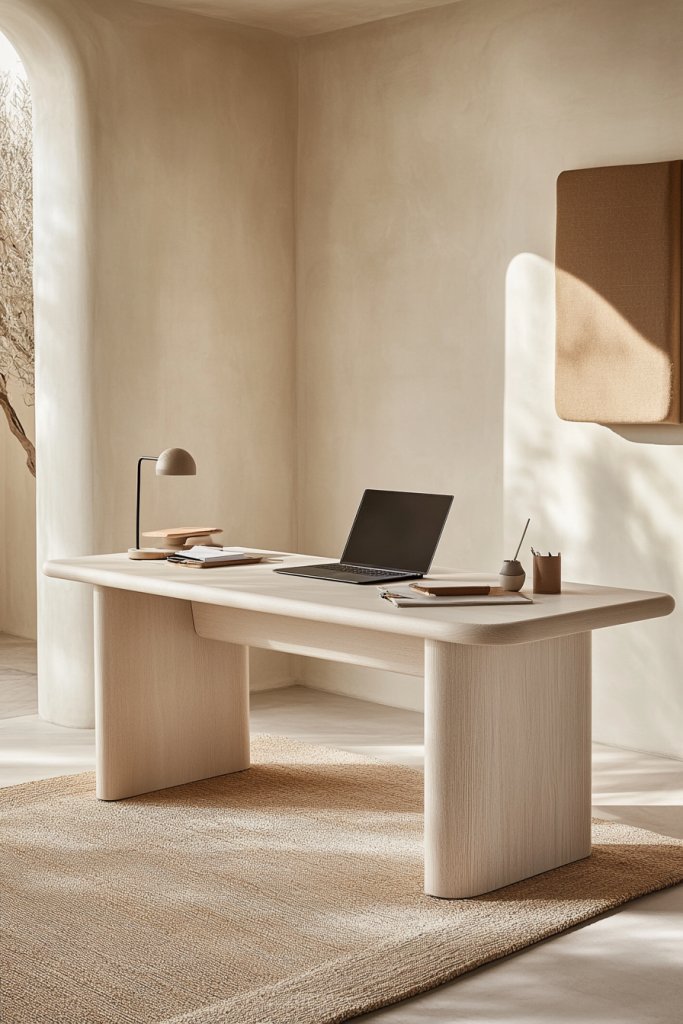
Creating a minimalist home office desk with Smastad components combines clean lines with practical functionality, perfect for boosting productivity while keeping your space clutter-free. Visualize a sleek, low-profile desk with a smooth, matte surface in a neutral hue like white or soft gray.
The desk is supported by slender Smastad legs, giving it an airy, modern appearance. The surface might feature a subtle textured finish, paired with minimalist accessories such as a simple ceramic pen holder, a small stack of notebooks, and a soft, neutral-colored throw blanket draped over a chair.
The overall setup feels calm and inviting, with a sense of order and space to focus. The design emphasizes simplicity and functionality, making it suitable for any small or shared workspace.
To build this desk, start by choosing a sturdy, flat Smastad tabletop or creating one by attaching a wooden panel to the frame. Attach the Smastad legs securely to the underside, ensuring stability.
For a cleaner look, consider painting the metal legs in a color that complements your room’s palette or leaving them raw for an industrial vibe. Add a cable management tray underneath for neatness and incorporate a small, stylish lamp for task lighting. This project requires basic tools like a drill and screwdriver and can be customized easily with paint or decals, making it a straightforward upgrade for your home office.
8. Crafting a Statement Coffee Table with Smastad Parts and Creative Legs

Transforming Smastad components into a bold, eye-catching coffee table can serve as the centerpiece of your living room, blending modern design with DIY charm. Picture a compact rectangular top made from a thick wooden board or a painted plywood surface, resting on an eclectic set of legs crafted from Smastad units.
You might opt for metal legs in a matte black finish or create a geometric base by joining several Smastad frames. The tabletop could be painted in a vibrant hue like mustard yellow or deep navy, adding a splash of color and personality.
The legs can feature contrasting textures—maybe one painted, one left raw metal—to create visual intrigue. Textured textiles such as a chunky knit throw or a woven tray can sit atop, enhancing tactile appeal.
This piece becomes both functional and artistic—perfect for lounging and conversation. Start by selecting a sturdy, flat surface for the tabletop.
Then, decide on your leg design: either repurpose Smastad frames as legs or build a custom base from them. Secure the legs firmly to the tabletop using appropriate screws and brackets.
Finish by painting or sealing the surface and legs for durability, and add decorative accessories like candles or a small sculpture. This project is accessible for DIY enthusiasts and invites endless customization, turning a simple idea into a stunning statement piece.
9. Repurposing Smastad Units into Functional Outdoor Furniture

Turning Smastad units into outdoor furniture offers a stylish and budget-friendly way to refresh your patio or balcony, blending functionality with weather-resistant design. Picture a cozy outdoor seating area with a Smastad-based bench or side table, constructed from rust-resistant metal frames and topped with a weatherproof surface like painted plywood or composite decking.
The surface can be finished in earthy tones like terracotta or moss green, merging seamlessly with natural surroundings. Cushions made from outdoor fabric in vibrant patterns or neutral tones can add comfort and visual appeal.
Incorporate decorative elements like woven lanterns, textured planters, or ceramic sculptures to enhance the space’s inviting atmosphere. The overall aesthetic is modern yet relaxed, perfect for outdoor gatherings or quiet evenings.
Begin by selecting Smastad units that can serve as the frame or base, and reinforce them with weatherproof paint or sealant. Attach a durable, waterproof tabletop material, securing it firmly to withstand outdoor conditions.
Add cushions and accessories designed for outdoor use, ensuring they are moisture-resistant. For added stability, anchor the furniture with weights or stakes if needed. This simple, customizable project is achievable with basic tools and offers a practical way to elevate your outdoor living space with style and resilience.
10. Adding Visual Interest with Colorful Tape and Patterned Wraps
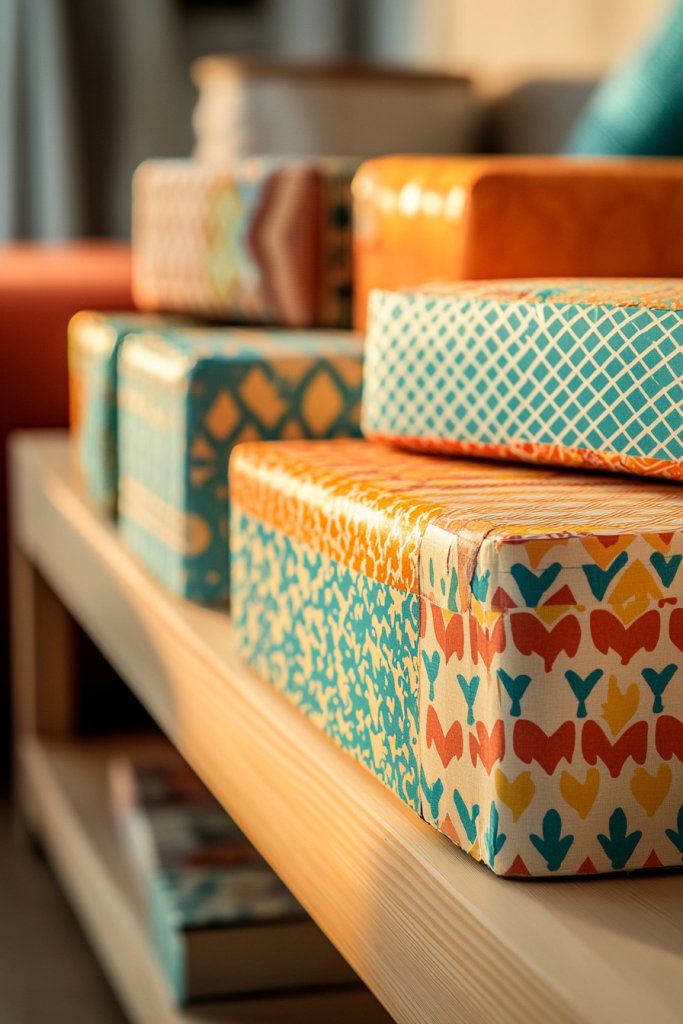
Infusing your Smastad furniture with vibrant color and patterns is an easy, instant way to personalize your space and create visual intrigue. Imagine wrapping the metal surfaces of a Smastad shelf or cabinet with bold, patterned vinyl or washi tape, transforming a plain piece into a lively focal point.
Choose tapes with geometric designs, botanical motifs, or playful stripes in shades like teal, blush, or mustard for a fresh, modern look. The textured tape can be applied smoothly, with clean, crisp edges that emphasize the pattern.
For a more tactile approach, you might add metallic foil wraps or textured fabric tape for extra dimension. Combining different patterns on adjacent surfaces creates a layered, eclectic aesthetic that can be easily updated or removed without damage, making it perfect for renters or those who like to frequently change their decor.
To start, clean the surface of your Smastad piece thoroughly, then carefully measure and cut your chosen tape or patterned wrap. Use a squeegee or credit card to smooth out air bubbles and ensure adhesion.
For corners or edges, fold the tape neatly for a professional finish. You can mix and match different patterns or colors to suit your style, or create a cohesive look with a single, bold design. This DIY technique is quick, affordable, and endlessly customizable, giving your furniture a playful, personalized touch that stands out.
11. Creating Customized Storage Ottomans with Upholstered Smastad Bases
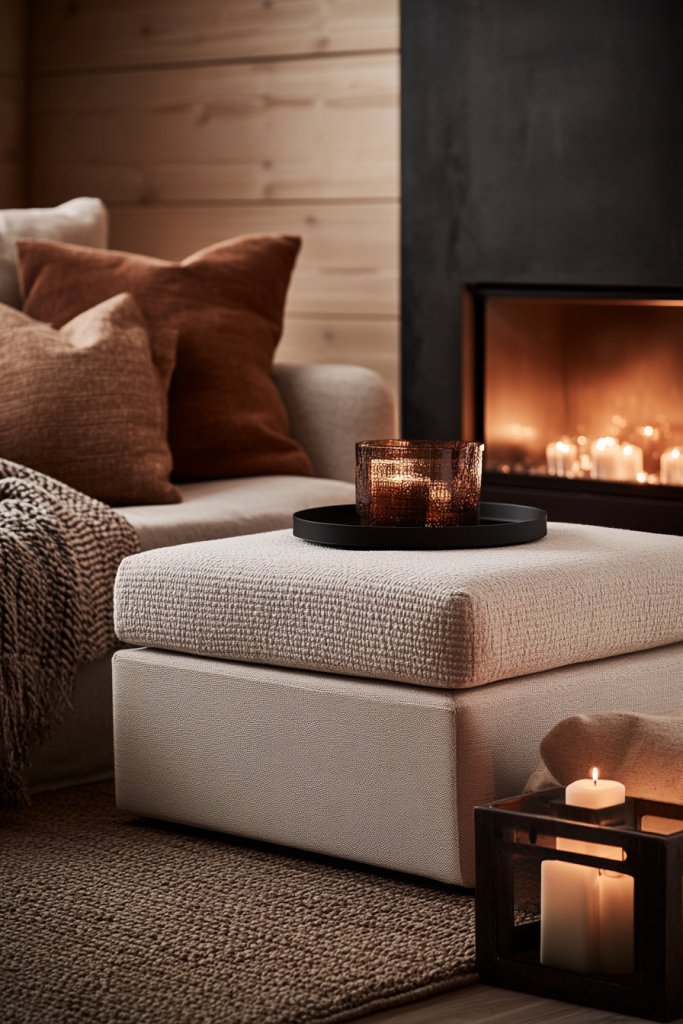
A stylish storage ottoman is a versatile piece that combines functionality with cozy appeal, and customizing a Smastad base adds a personal touch to your space. This idea transforms simple storage into an inviting focal point, perfect for living rooms or bedrooms.
Imagine a rectangular box with a soft, plush cushion on top, covered in a textured fabric like a chunky knit in warm neutrals—think oatmeal or blush pink. The Smastad base serves as a sturdy frame, wrapped in a vibrant patterned fabric or sleek velvet for a luxe feel.
Hidden compartments within provide ample space for blankets, magazines, or toys, while the upholstered top invites you to sit comfortably. The overall look is both modern and cozy, with tactile contrasts in the fabric and a clean-lined silhouette that complements various decor styles.
The scent of fabric softener or fresh linen adds to the inviting atmosphere. To create your own upholstered storage ottoman, start with a Smastad base and choose a cushion or foam padding that fits perfectly.
Cover it with a fabric of your choice—consider an affordable option like a durable polyester or a chic velvet for a more upscale look. Secure the fabric with a staple gun underneath, ensuring a smooth finish.
Add decorative trim or buttons for extra detail if desired. Place your finished piece in your living room or bedroom for an instant upgrade that’s both practical and stylish.
12. Designing a Stylish TV Console with Open Shelves and Hidden Storage
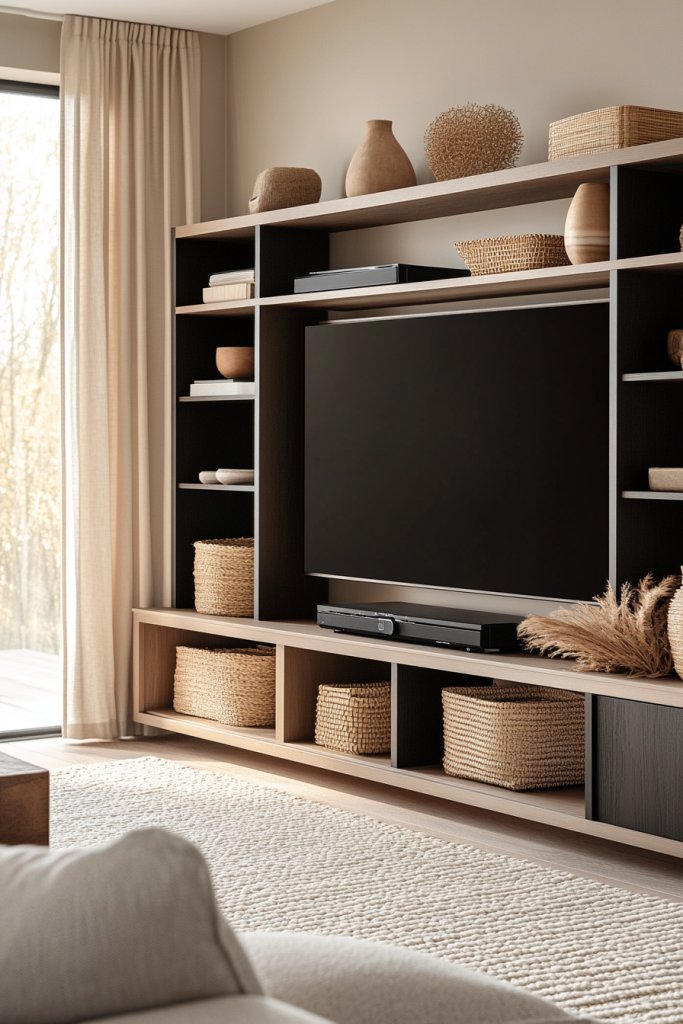
A sleek TV console elevates your entertainment area by blending clean design with functional storage, and using Smastad components makes it customizable and budget-friendly. This project combines open shelving for display with concealed compartments for tidiness.
Picture a low-profile unit with a smooth, matte finish in a neutral color like charcoal gray or soft beige. The open shelves showcase decorative objects such as ceramic vases, candles, or family photos, while the hidden compartments behind doors hide away electronic clutter.
The overall design is minimalist, with straight lines and a balanced mix of textures—perhaps a wood-look laminate paired with matte black hardware. The space feels open yet organized, with a calming aesthetic that invites relaxation and socializing.
To build this, start by assembling a Smastad frame as your base. Attach open shelves made from lightweight plywood or MDF painted in your chosen color, securing them with brackets or cleats.
For hidden storage, incorporate doors or panels with magnetic or soft-close hinges—these can be custom cut and painted. Finish with decorative hardware like sleek black handles or pulls. Arrange your console in your media room, positioning it below your TV, and fill the open shelves with your favorite curated objects for a personalized touch.
13. Building a Unique Bed Frame Using Smastad Components and Industrial Details
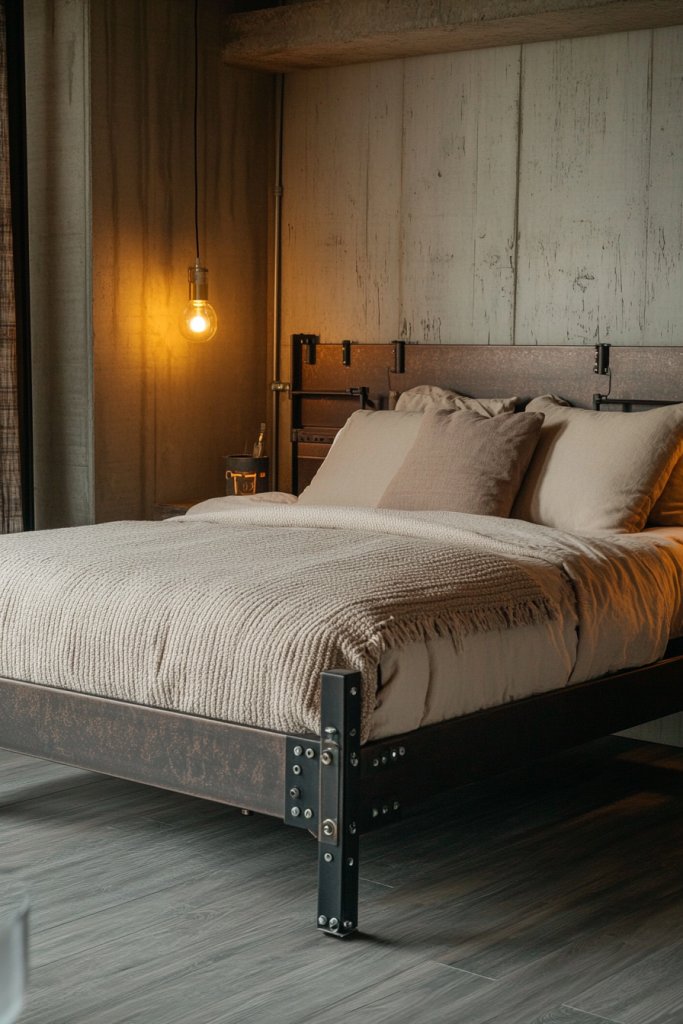
Transforming Smastad parts into a distinctive bed frame combines industrial charm with DIY creativity, making your bedroom both functional and visually striking. This approach emphasizes sturdy materials and bold design elements.
Visualize a sturdy platform with a raw, industrial vibe—think dark metal pipes or reclaimed wood accents combined with the clean lines of Smastad. The bed frame might feature a headboard made from repurposed wood planks or metal piping, attached securely to the Smastad base for stability.
The overall look is minimal yet bold, with a mix of matte black finishes and natural wood textures. The space feels grounded and modern, with an edgy yet cozy atmosphere that invites rest and relaxation.
Begin by assembling a basic Smastad frame as your foundation. Add industrial-style elements like black pipe fittings or wood panels for the headboard—these can be sourced from hardware stores or repurposed from old furniture.
Secure everything with appropriate screws and brackets, ensuring stability. Finish by painting or sealing wood surfaces if needed, and add a mattress on top. This DIY bed frame offers a unique focal point that blends industrial chic with budget-friendly craftsmanship, perfect for modern or eclectic bedrooms.
14. Converting Smastad Units into Elegant Bathroom Storage Cabinets
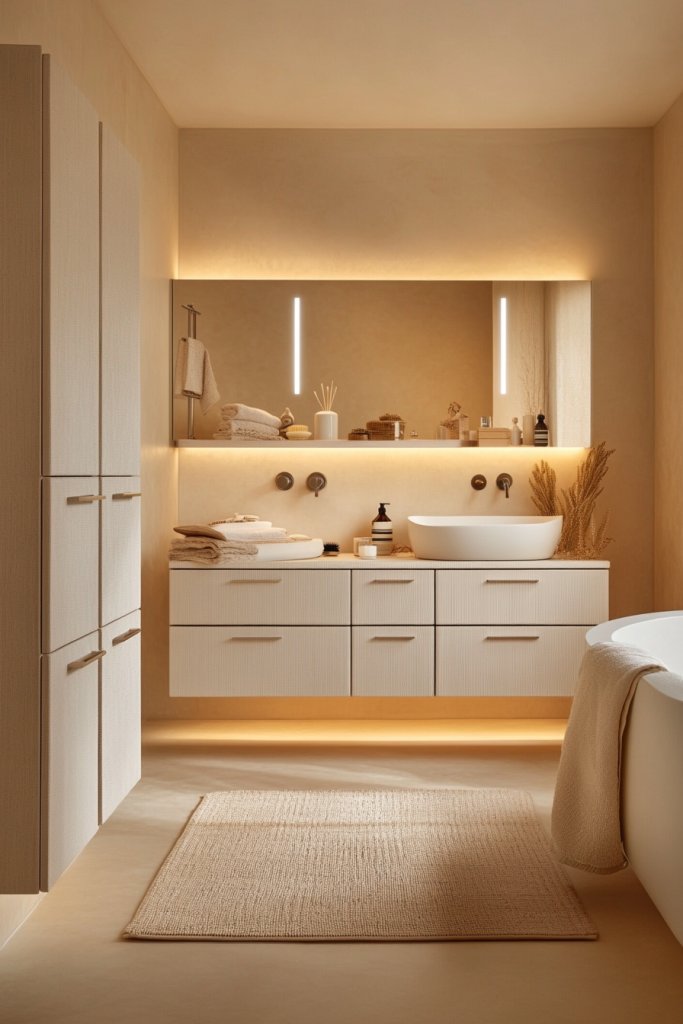
Using Smastad as a base for bathroom storage combines practicality with sleek design, creating organized spaces that feel luxurious yet are easy to maintain. This hack turns simple units into sophisticated cabinetry.
Picture a clean-lined cabinet with a glossy or matte finish in soft shades like light gray, navy, or pastel blue. Incorporate open shelves for towels or toiletries, alongside concealed compartments behind doors for items you want out of sight.
Metal handles or knobs, perhaps in brass or matte black, add a touch of elegance. The overall aesthetic is polished, with smooth surfaces and subtle detailing that elevate your bathroom decor.
The space becomes calm and clutter-free, fostering a spa-like atmosphere. Start by assembling your Smastad units and then modify them to fit your bathroom layout.
Attach doors made from waterproof MDF or laminate panels, secured with hinges and finished with decorative hardware. Seal surfaces with a waterproof paint or varnish to withstand humidity.
Inside, add storage baskets or containers for small items. Position your custom cabinets against the wall, and fill with neatly organized essentials for a tidy, stylish bathroom that feels custom-designed.
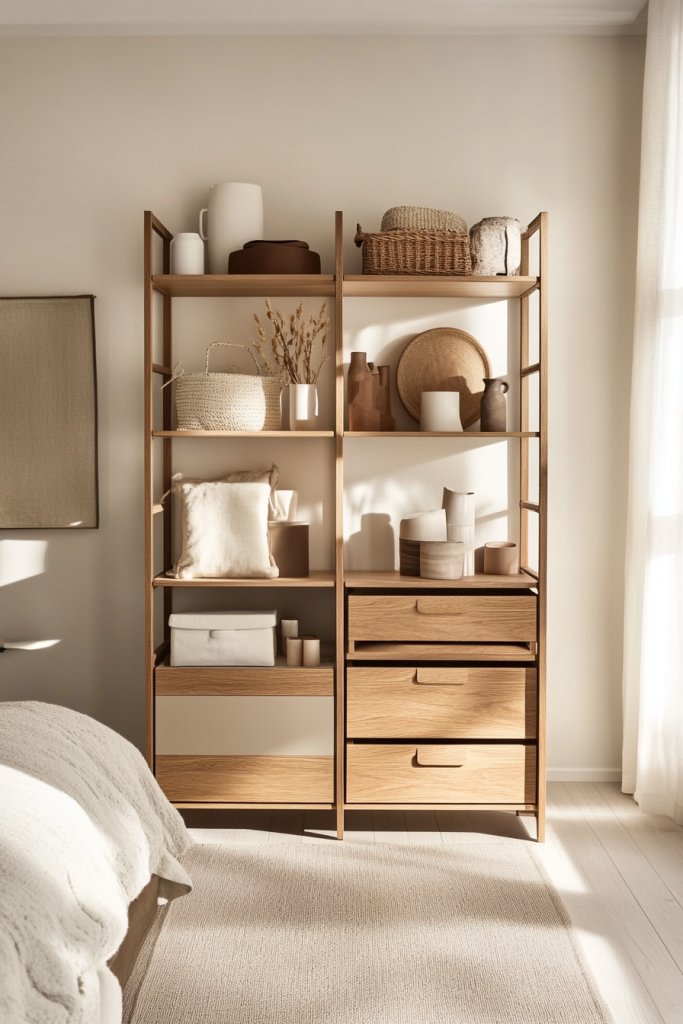
15. Fashioning a Versatile Bookcase with Adjustable Shelves and Accent Colors
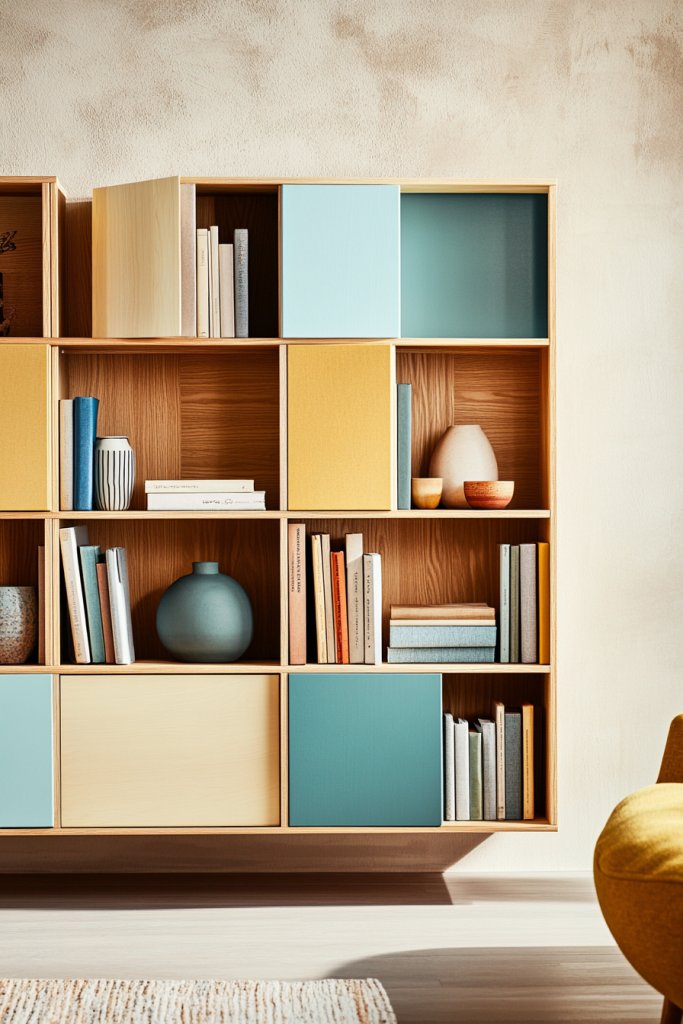
A customizable bookcase made from Smastad components is perfect for displaying your favorite books and decor, with the flexibility to adapt as your needs change. This project emphasizes adjustability and personal style.
Envision a tall, open bookcase with a fresh, vibrant color palette—perhaps a soft teal or warm terracotta—paired with natural wood or painted shelves. The adjustable shelves allow you to accommodate objects of various sizes, from small collectibles to large books.
Add decorative accents like ceramic vases, framed photos, or textured storage boxes to bring personality and warmth. The overall look is modern yet inviting, with a balanced mix of color, texture, and function, making your space feel lively and curated.
To build this, start with a Smastad frame and install adjustable shelf brackets at your desired heights. Choose shelves made of lightweight but sturdy material like plywood or MDF, painted or stained to match your color scheme.
Secure the shelves with screws into the brackets, ensuring stability. Add decorative edge banding or trim if desired for a polished finish.
Arrange your books and accessories thoughtfully, creating a dynamic display that can evolve as your collection grows—this makes your bookcase both practical and a statement piece in your home. Let me know if you’d like me to expand on the remaining subheadings!
16. Crafting a Compact Bar Cart with Smastad and Decorative Accessories
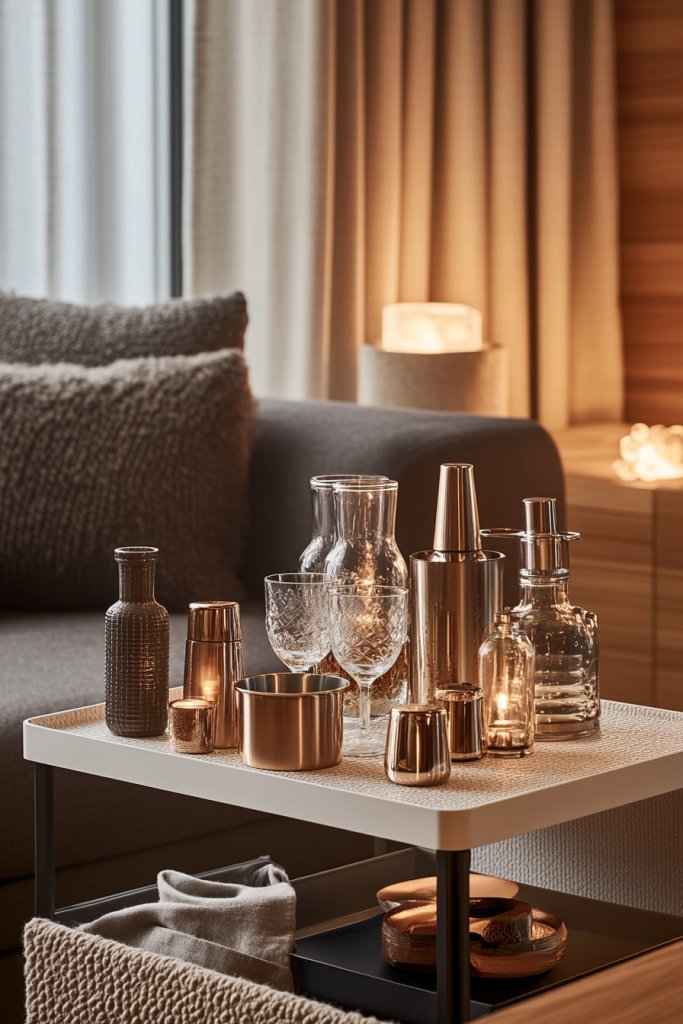
A stylish bar cart is a perfect way to elevate your entertaining space without taking up too much room, and a Smastad hack offers a sleek, customizable solution. This idea transforms simple IKEA components into a chic, functional piece that can hold your favorite spirits and glassware, adding a touch of sophistication to any corner of your home.
Imagine a compact, multi-tiered cart with a matte black or metallic finish, featuring clean lines and minimalist design. The top shelf might display a few elegant decanters and glassware, while the lower levels can hold cocktail tools, small plants, or decorative accents like vintage coasters or ceramic bowls.
The overall look is modern yet inviting, with textured textiles like a soft linen runner or a woven placemat for added warmth. The wheels make it mobile, allowing you to easily move it for parties or cozy nights in, while the layered design creates visual interest and accessibility.
To create your own Smastad bar cart, start with two or three Smastad shelving units or frames, stacking or arranging them side-by-side. Secure them together with brackets or adhesive if needed, then add decorative accessories such as a metal or wood tray, glass jars, or vintage bottles.
Finish with a metal or wooden handle or knob to give it a polished look. For a personalized touch, incorporate LED string lights or decorative labels. This project is straightforward for DIY beginners and allows endless customization to match your style and space.
17. Repurposing Smastad into a Kid-Friendly Playroom Organizer

Transforming Smastad furniture into a playful, organized space for kids is a smart way to keep toys tidy while adding colorful charm to the playroom. This hack combines practicality with fun, making clean-up easy and encouraging kids to participate in maintaining their space.
Picture a vibrant, multi-level storage unit painted in cheerful colors like pastel pink, bright blue, or sunny yellow, with soft rounded edges for safety. The open shelves hold bins and baskets filled with building blocks, art supplies, or stuffed animals, while the lower compartments can host larger toys or books.
Add playful touches like colorful patterned washi tape trims or stickers to personalize each section. The whole setup feels inviting, with textured fabrics like soft felt or plush cushions on top, creating a cozy nook for reading or resting.
The design is lively, with a mix of open storage and hidden compartments to keep the space clutter-free and engaging. To make this organizer, start with Smastad cabinet units or shelving frames, painting or decorating them with non-toxic, child-safe paints in bright hues.
Incorporate baskets or fabric bins that fit within the shelves to contain small toys, choosing washable options for easy cleaning. Secure the units to the wall with brackets or safety straps to prevent tipping.
For added fun, attach decorative knobs or label tags to help kids identify where items go. This project is accessible for DIYers and provides a versatile, customized solution that grows with your child’s needs.
18. Enhancing Entryway Functionality with Customized Smastad Shoe Storage
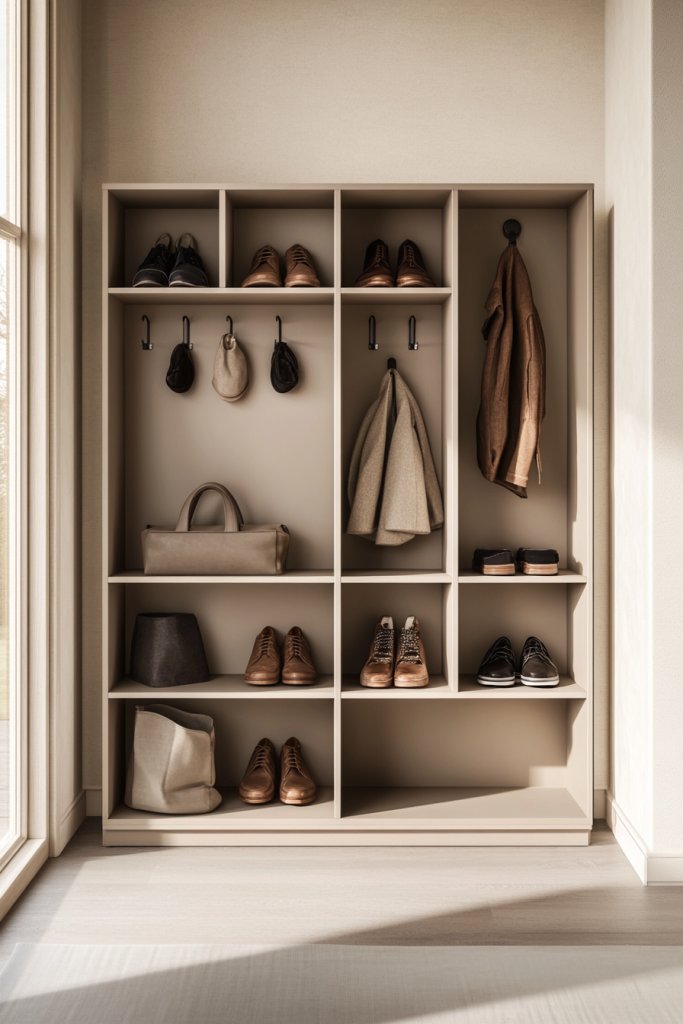
A well-organized entryway sets the tone for your home, and a Smastad hack offers a sleek, practical way to keep shoes and accessories tidy. Customizing this furniture makes your entryway both functional and welcoming, with a modern aesthetic that adapts to any space.
Visualize a streamlined shoe storage unit with open shelves or cubbies, painted in a neutral tone like soft gray or crisp white, accented with decorative hardware such as brass or matte black knobs. The lower compartments are perfect for storing shoes, while the top surface can hold a cozy doormat, key bowls, or small decorative objects like ceramic vases or candles.
Incorporate textured textiles, like a woven runner or felt pads, to add warmth and cushion. The overall look is minimalist and organized, with a tactile balance of smooth surfaces and soft accents, making it a functional focal point in your home’s entrance.
To build this customized shoe storage, start with Smastad shelving units or frames that fit your space. Paint or coat the units with durable, washable paint for easy maintenance.
Add shelves or baskets for shoes, and attach decorative hardware for style and ease of use. Secure the unit to the wall with brackets or anchors for safety.
Finish by decorating the top with a small mirror, a tray for keys, or a decorative vase to personalize it. This project is simple enough for DIY beginners and makes a big impact on daily organization.
19. Adding Textural Appeal with Fabric Panels and Decorative Hardware to Smastad Furniture
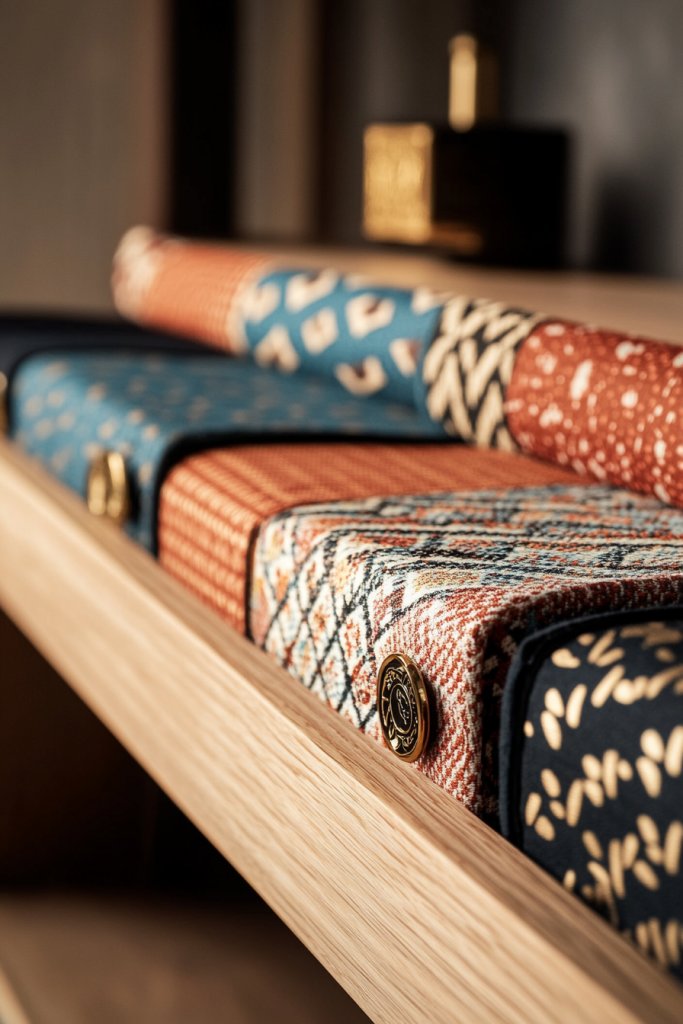
Injecting texture and personality into your Smastad furniture transforms simple pieces into eye-catching, tactile statements. By adding fabric panels and decorative hardware, you create rich visual contrast and a cozy vibe that elevates your home decor effortlessly.
Envision a piece like a sideboard, dresser, or shelving unit covered in soft fabric panels—think velvet, linen, or quilted textiles—secured with staples or fabric glue. Choose colors and patterns that complement your room’s palette, such as muted earth tones or bold geometric prints.
Enhance the look with brass or matte black decorative hardware like knobs, pulls, or corner accents, adding a touch of vintage or industrial flair. The textured fabric creates a layered, inviting feel, while the hardware adds visual interest and a sense of craftsmanship.
This approach makes the furniture feel unique and more luxurious, perfect for a modern or eclectic space. To implement this idea, start with a basic Smastad piece—such as a cabinet or shelf—then cut your chosen fabric to size, leaving enough to wrap around edges.
Attach the fabric securely with staple guns or strong adhesive, smoothing out any wrinkles. Add decorative hardware to the front or corners for extra detail and functionality.
For a more refined look, incorporate trim or piping along the edges of the fabric. This project is beginner-friendly, cost-effective, and results in a one-of-a-kind piece that combines texture and style seamlessly.
Conclusion
With so many creative ways to transform Smastad IKEA units—from chic bathroom vanities and stylish storage solutions to statement furniture pieces—there’s endless potential to elevate your home style. Whether you’re customizing for functionality or adding bold design touches, these hacks inspire you to reimagine your space with ease and flair. Don’t be afraid to experiment and make these ideas uniquely yours—your dream home is just a hack away! Start crafting today and turn everyday furniture into extraordinary statement pieces.
Leave a Reply